

Post by 61shastacompact on Mar 5, 2010 22:23:41 GMT -5
I finally got around to fabricating the wings for my Compact. The original wing design was a 8X36" wing that had a solid wooden core. Needless to say the wooden core wings are not the best design for longevity nor the best idea to offer a stable sealing surface.
I built my wings using 1/2" dolphin gray King Starboard marine plastic for the core. I used the info found here for the nose profile: www.freewebs.com/kc8jwa/ShastaWing[1].pdf
I cut the plastic using the table saw for the straight cuts and a jig saw for the nose with final profiling being done with a disc sander.
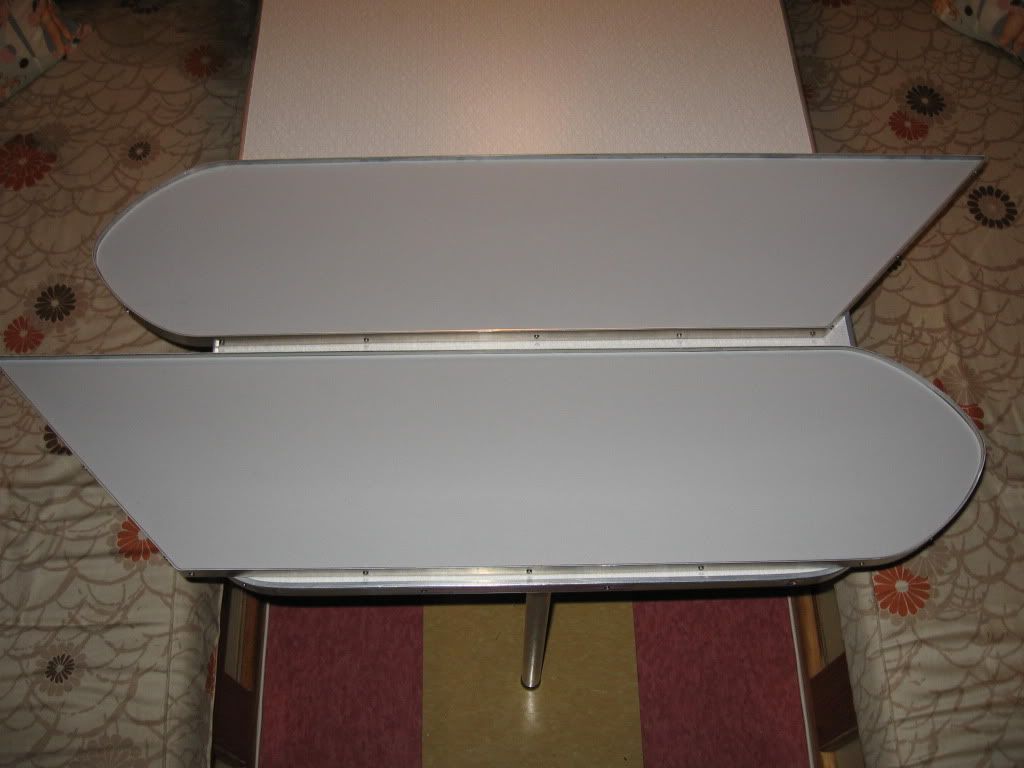
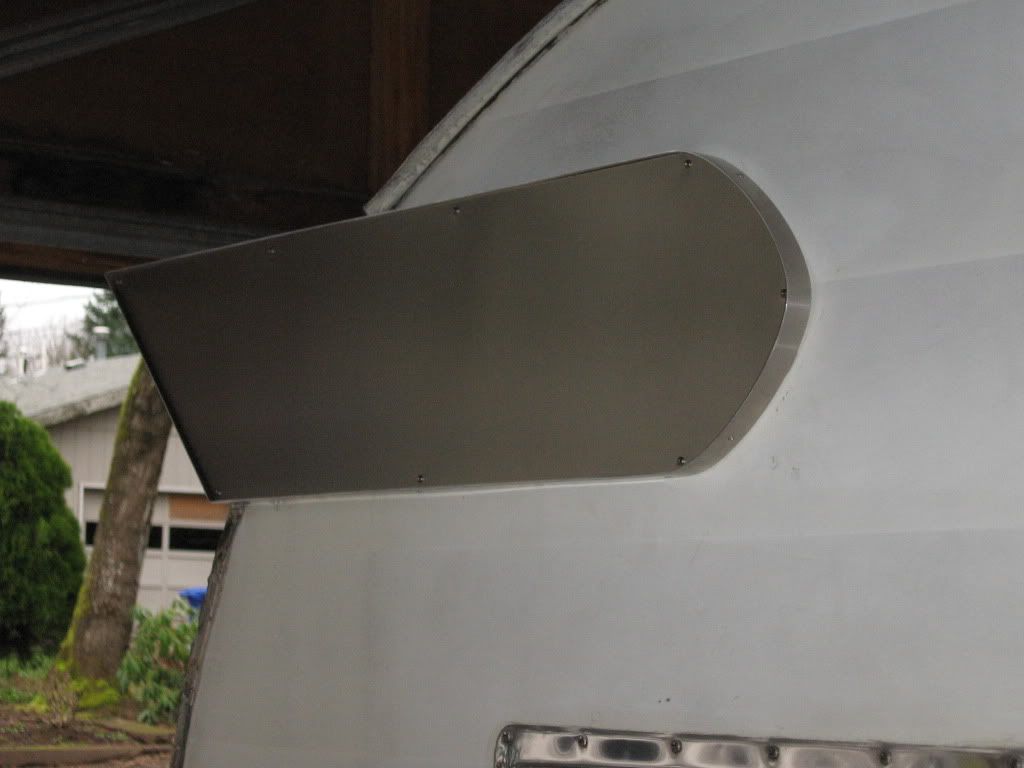
Next I wrapped the outside of the wing with a strip of .063" (1/16") aluminum sheet that I had cut 3/4" wide and 8' long. This was screwed down with SS flat head #4 screws that were counter sunk for a flush finish. The results can be seen here.
For the face and back tail of the wings, I used .025" aluminum (I would probably move up to a thicker gauge aluminum if I were to do it again) that I cut to match the plastic core. After rough cutting the nose with tin snips, I clamped the aluminum to the core and used the router with a flush cut trim bit to exactly match the core form. This was done BEFORE mounting the outside 3/4" aluminum banding.
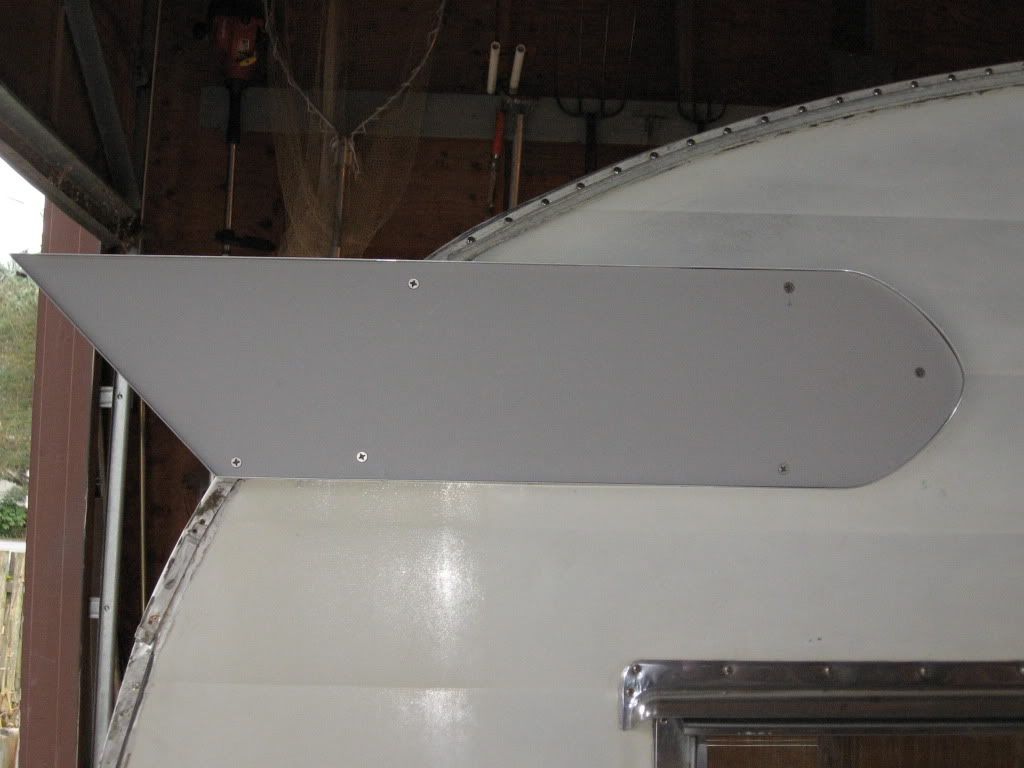
Here is a shot of the wing mounted before the front face is installed. It is mounted using counter sunk flat head SS screws that are 1.25" long. I flush mounted mine like the originals because my drip rail is cut out for the wings. Spacers could be used if you have a continuous drip rail as in later models.
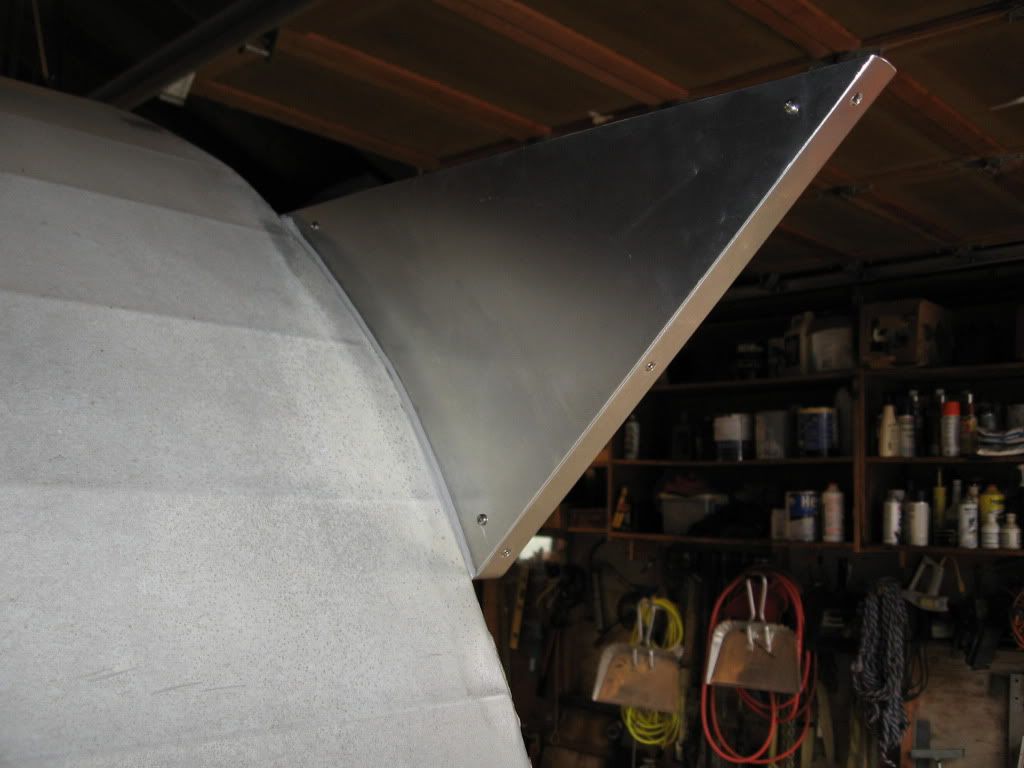
Here is the backside of the tail of the wing covered in aluminum.
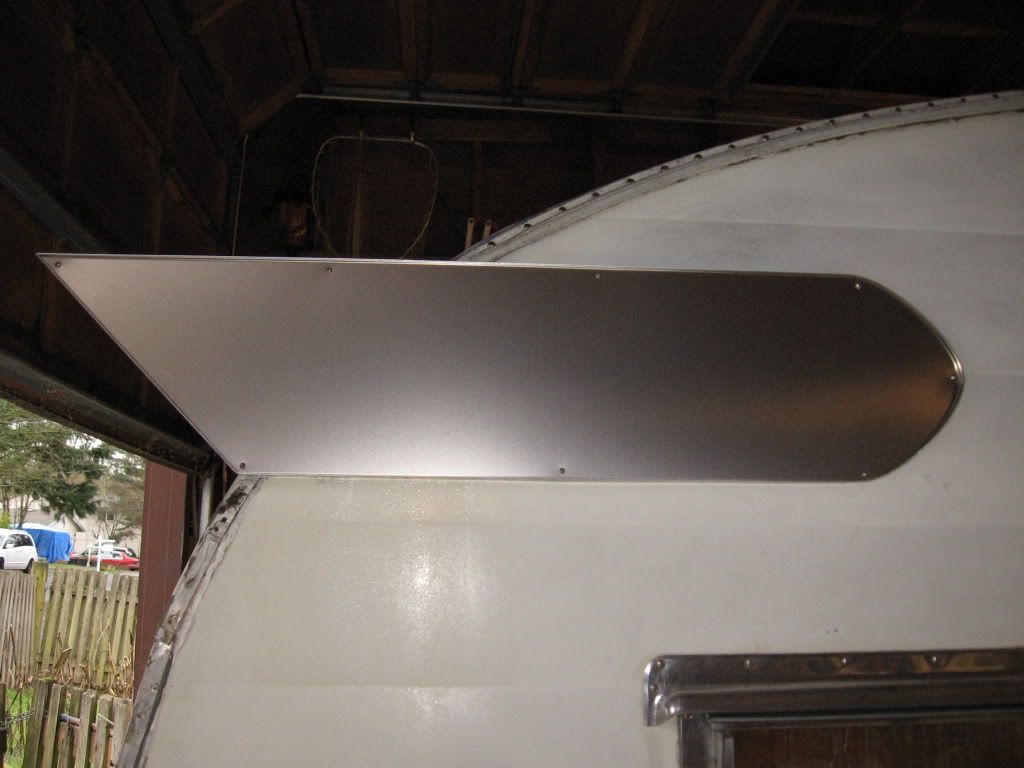
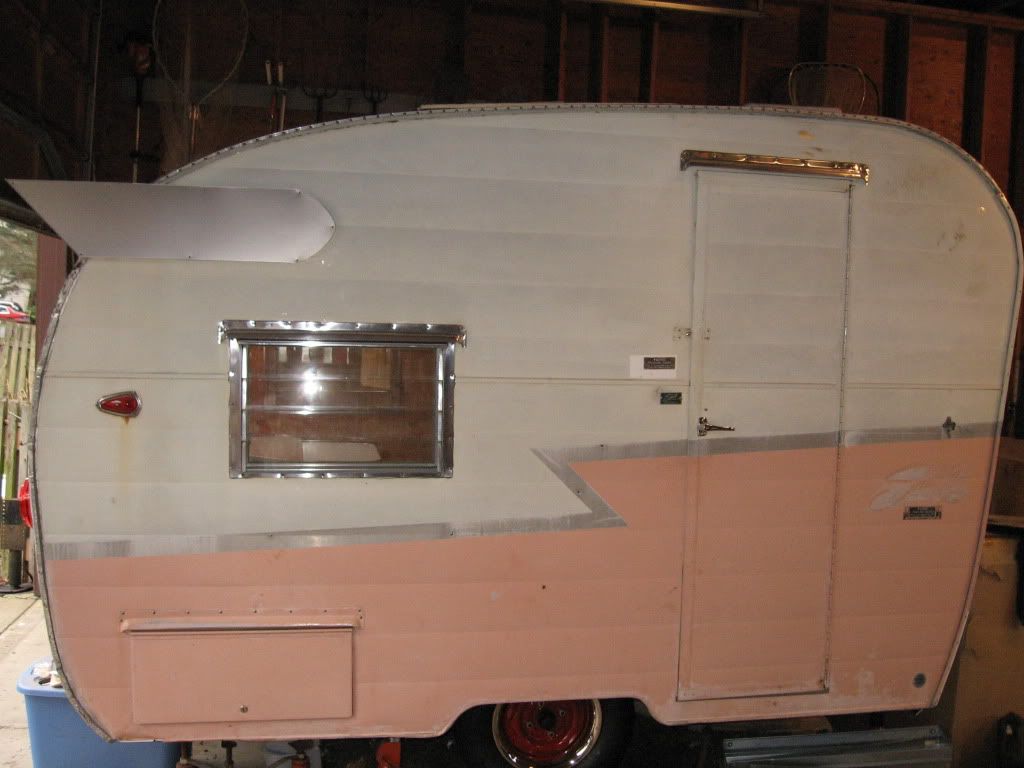
Here is a shot of the completed wing with the aluminum face.
And finally the money shot of the trailer with her new wings.
I hope this info is helpful to others in their quest to re-wing their Shasta trailers.
Jim
I built my wings using 1/2" dolphin gray King Starboard marine plastic for the core. I used the info found here for the nose profile: www.freewebs.com/kc8jwa/ShastaWing[1].pdf
I cut the plastic using the table saw for the straight cuts and a jig saw for the nose with final profiling being done with a disc sander.
Next I wrapped the outside of the wing with a strip of .063" (1/16") aluminum sheet that I had cut 3/4" wide and 8' long. This was screwed down with SS flat head #4 screws that were counter sunk for a flush finish. The results can be seen here.
For the face and back tail of the wings, I used .025" aluminum (I would probably move up to a thicker gauge aluminum if I were to do it again) that I cut to match the plastic core. After rough cutting the nose with tin snips, I clamped the aluminum to the core and used the router with a flush cut trim bit to exactly match the core form. This was done BEFORE mounting the outside 3/4" aluminum banding.
Here is a shot of the wing mounted before the front face is installed. It is mounted using counter sunk flat head SS screws that are 1.25" long. I flush mounted mine like the originals because my drip rail is cut out for the wings. Spacers could be used if you have a continuous drip rail as in later models.
Here is the backside of the tail of the wing covered in aluminum.
Here is a shot of the completed wing with the aluminum face.
And finally the money shot of the trailer with her new wings.
I hope this info is helpful to others in their quest to re-wing their Shasta trailers.
Jim
 See my rebuild pics at:


 I may be painting my hubcaps as well at some point.