Post by offspringin on Dec 27, 2012 10:10:56 GMT -5
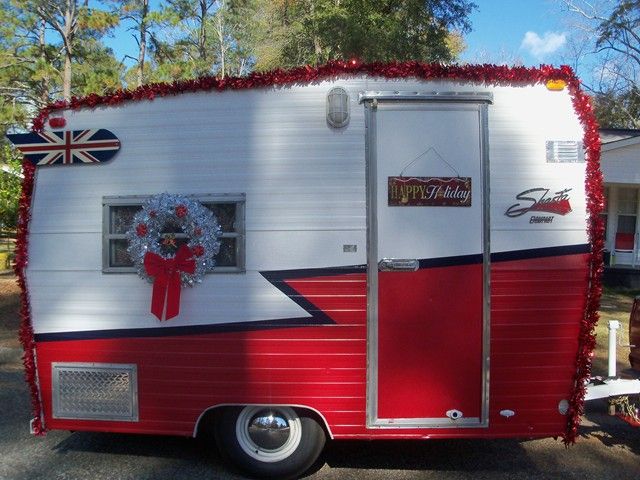
So I had an idea suddenly a couple months back. It was sparked by the 60s year tin models that show up on eBay. I want one of those but not bad enough to pay 100+ for one. Then i got to thinking that i would rather have one of our compact. I'm not aware of any having been made back in the day.... so I made one.
This was originally going to be an anniversary gift for my wife but I came up with said idea only 2 weeks ahead of that date. SO.... it became a Christmas gift. Sure was hard to keep a secret but i needed more time to complete it. Had to fit it in where i could at work and then the time spent on it at home had to be done when she was working evenings (which is rare).
Took photos along the way of how I made it, if your interested in reading that scroll through the photos. If you just want to see the final project just skip to the bottom.
The process.
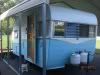
I work at a place that makes aluminum/steel products. Having been taught how to run the machines makes it easier to sneak some personal items through. This guy was made out of scrap metal, drop metal off of full sheets. I had used a side shot of our trailer to draw up all the main lines in CAD so I knew what sizes i was looking for. I found some .090 metal in the scrap bin and got to work.
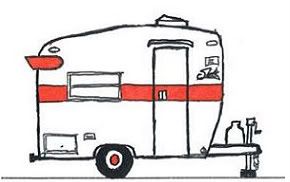
Had to cut the blanks first, then using the press brake and a little guess work on the settings made the front/top/back piece. (its all one piece) I made the sides to fit the final product of the top. This was actually the 2nd top piece i had to make. Made a mistake on the first one. Had all my bends completed and went back to touch up the angle of one. Put the press on the wrong bend and suddenly my back wall was about 30 degrees to the roof.... sigh.... But the second came out better and it ended up being the final parts cut.
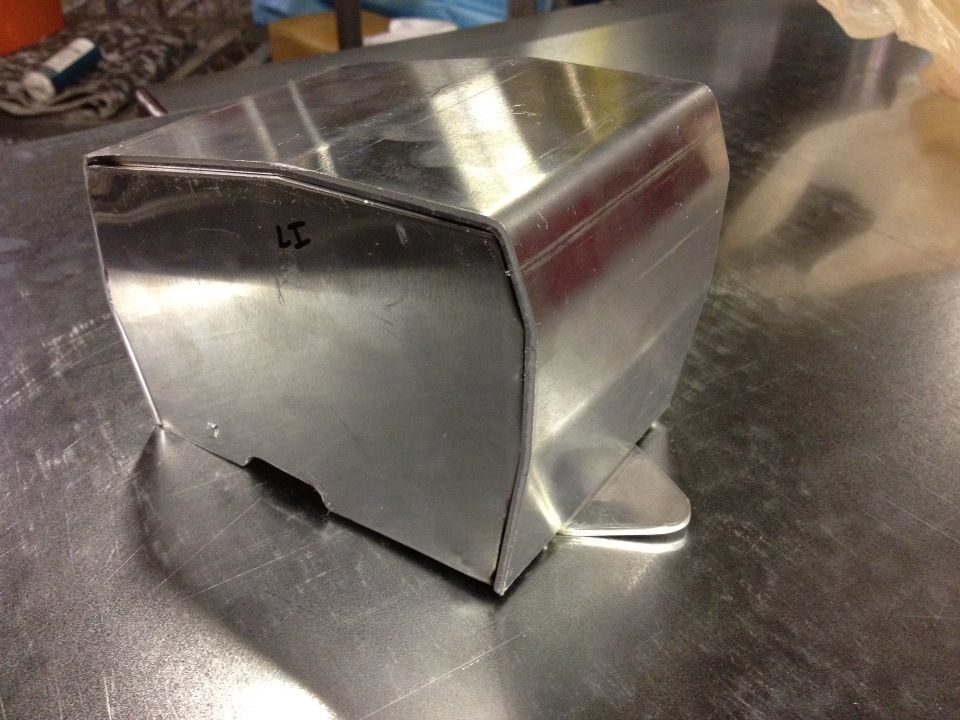
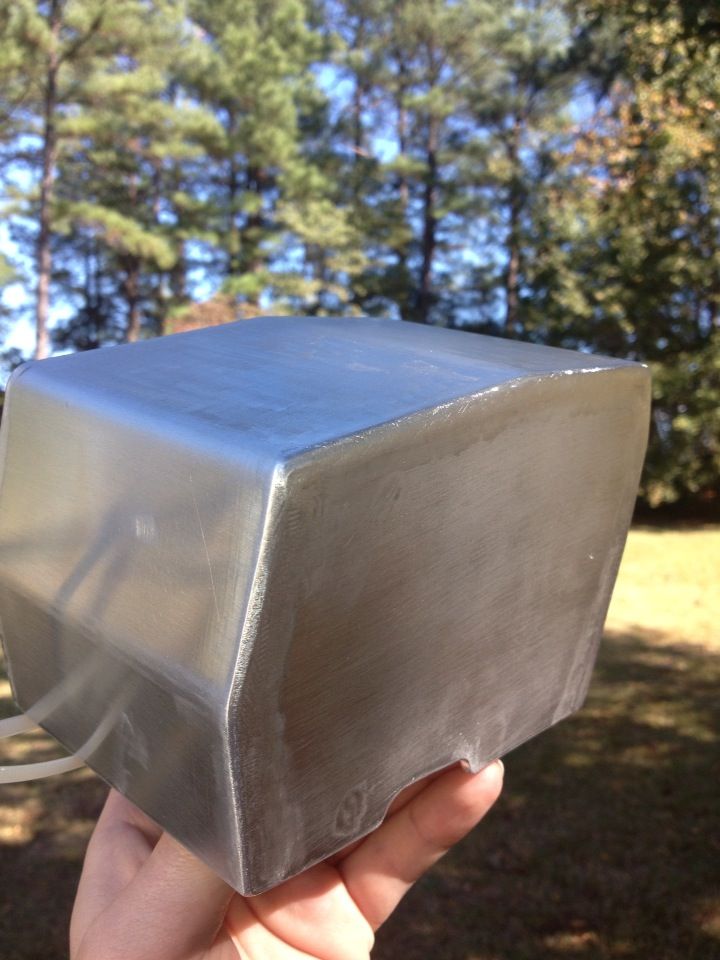
So this is the parts cut out and just placed together. Not welded yet. The white you see on the top/front is a PVC plastic sheet used to protect the metal in production. I just had not peeled it off yet.
Here are the little roof vent made out of a 1 x .25" stick of alum flat bar and the little LP tank made of 1/2 alum rod sitting on a hitch.
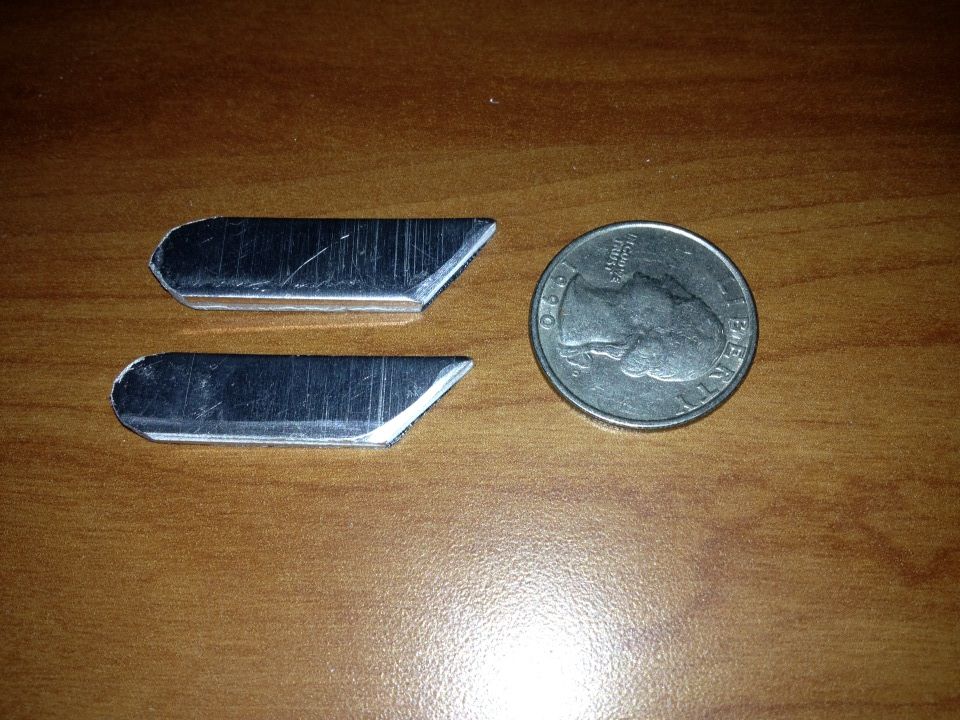
Of course i needed wings. Here those are with a quarter just for scale.
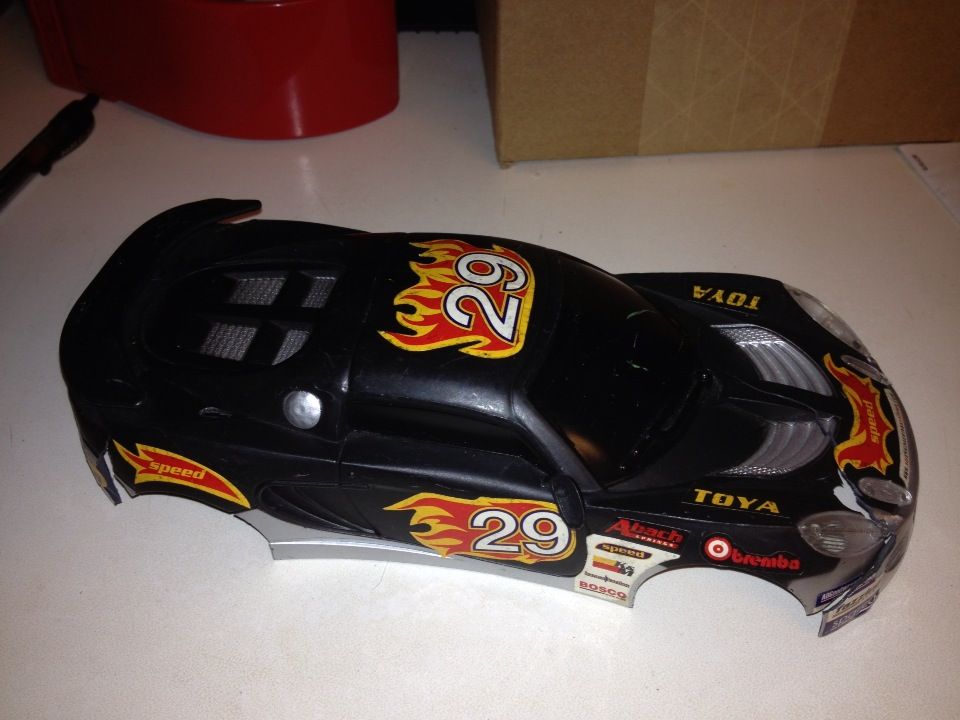
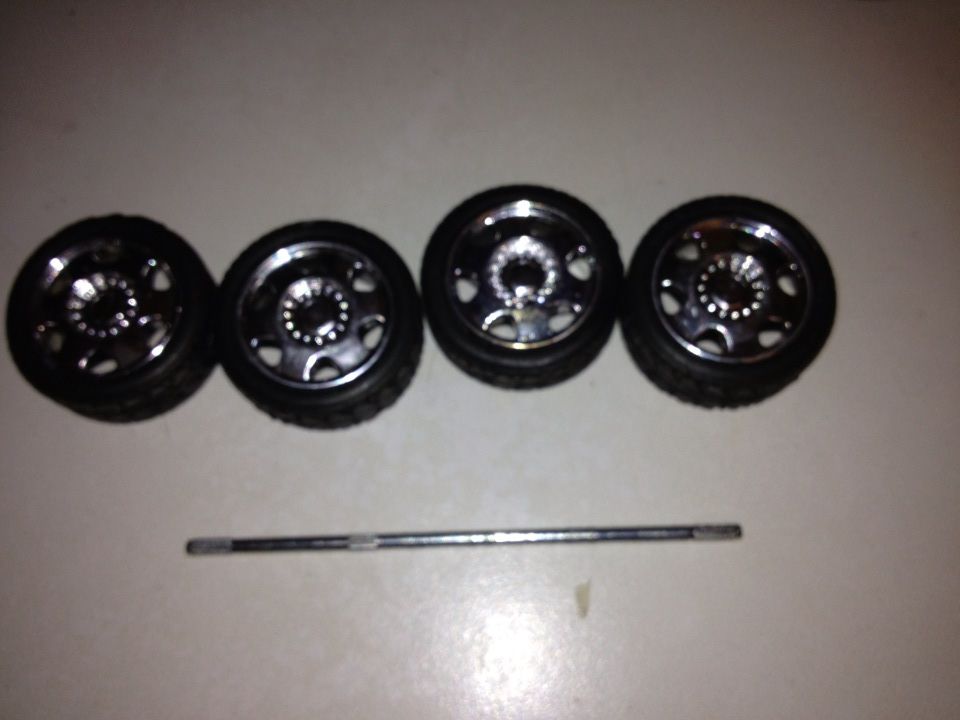
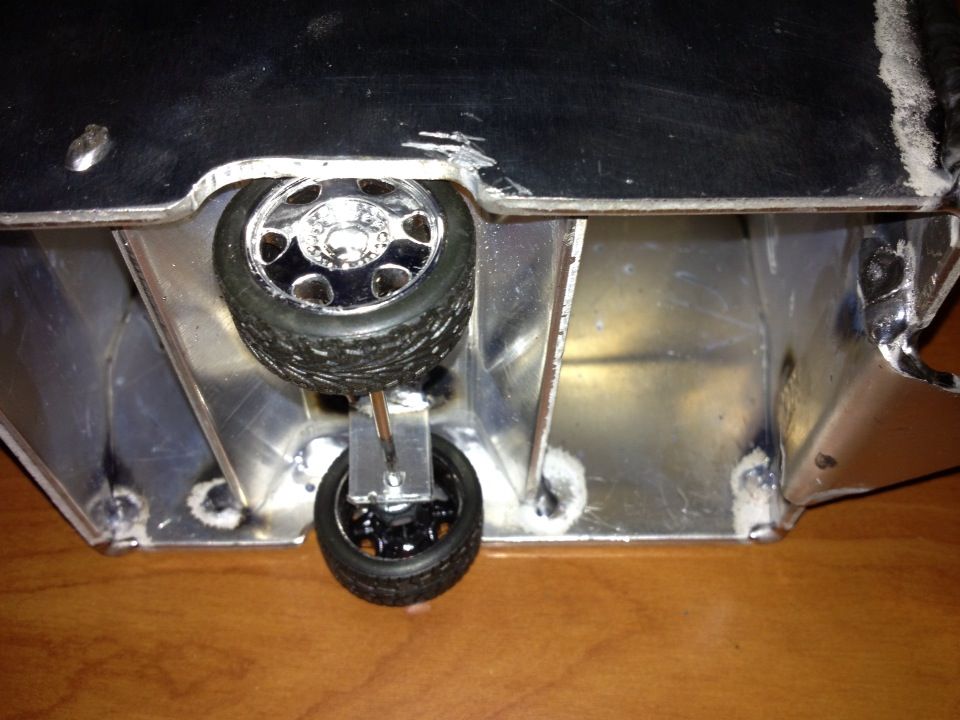
I went to Goodwill in the hunt for wheels for it. I was lucky and the first time i tried to find some i scored this little cheap RC car. The rear axle/wheels were the perfect size and width so .99 cents later i had my wheels.
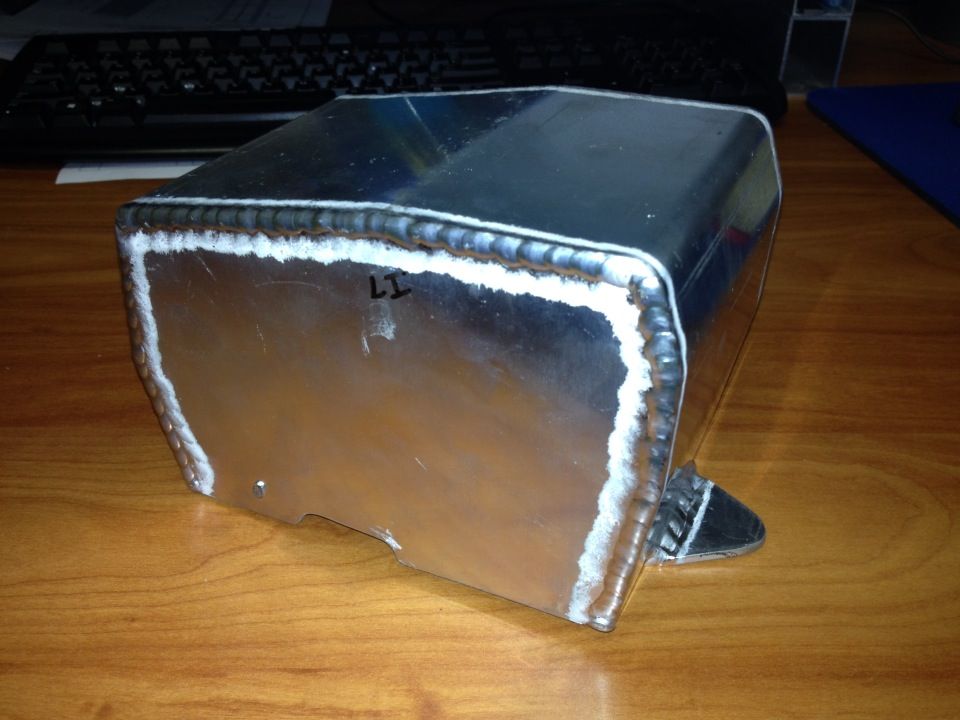
Now the camper has been spot welded from the inside in prep for the TIG weld that would complete the welding process.
And here it is with the TIG welding done.
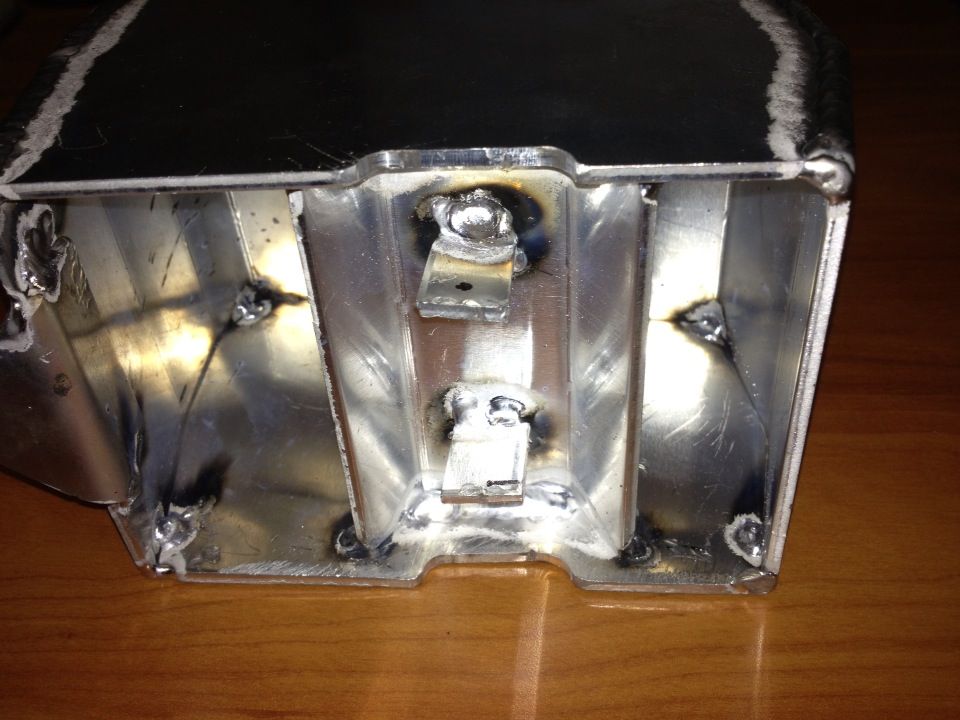
A shot of the underside showing the cross support for the axle mounts
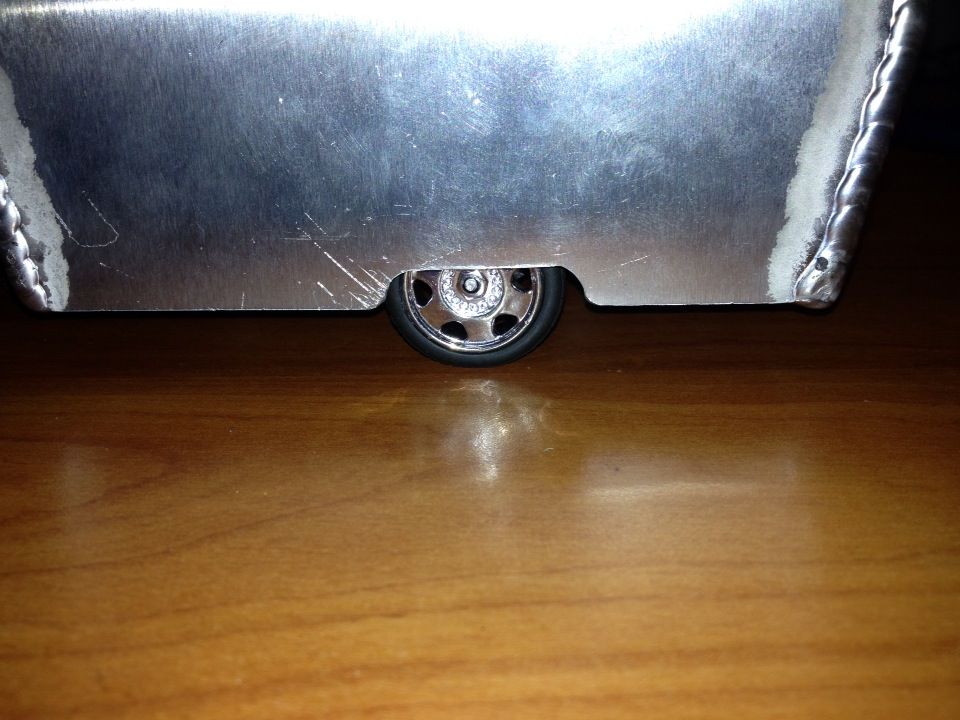
And a shot with the wheels mounted for the first time.
Just checking to see how it sits
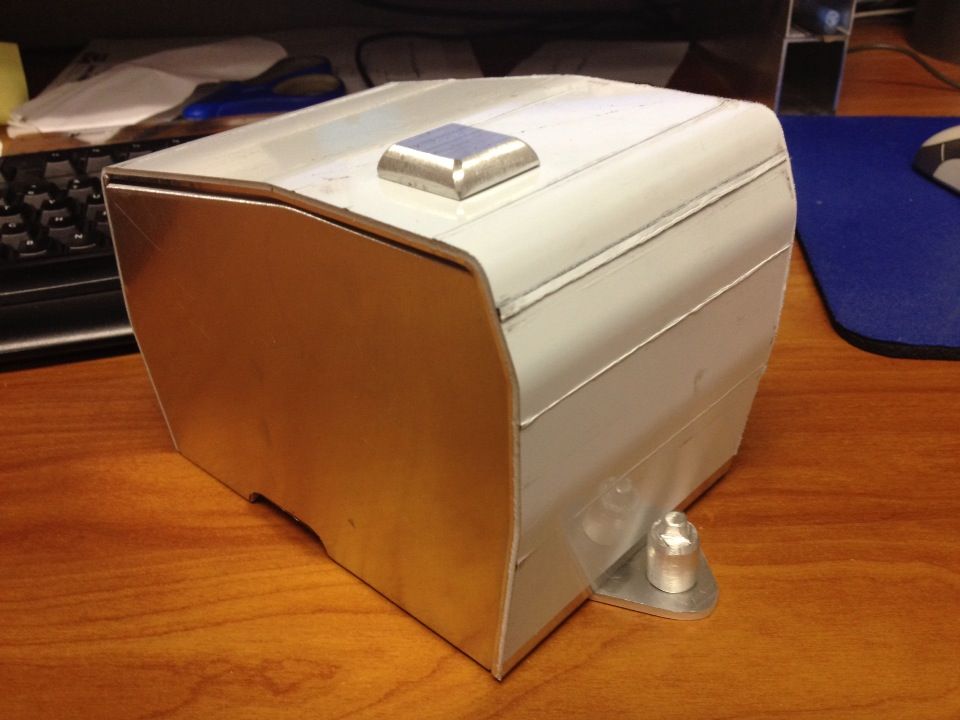
Filed off the weld by hand to create a smooth side/corner. Touched up the file work with the sanding disc on the dremel

Then roughed it all up for better paint adhesion
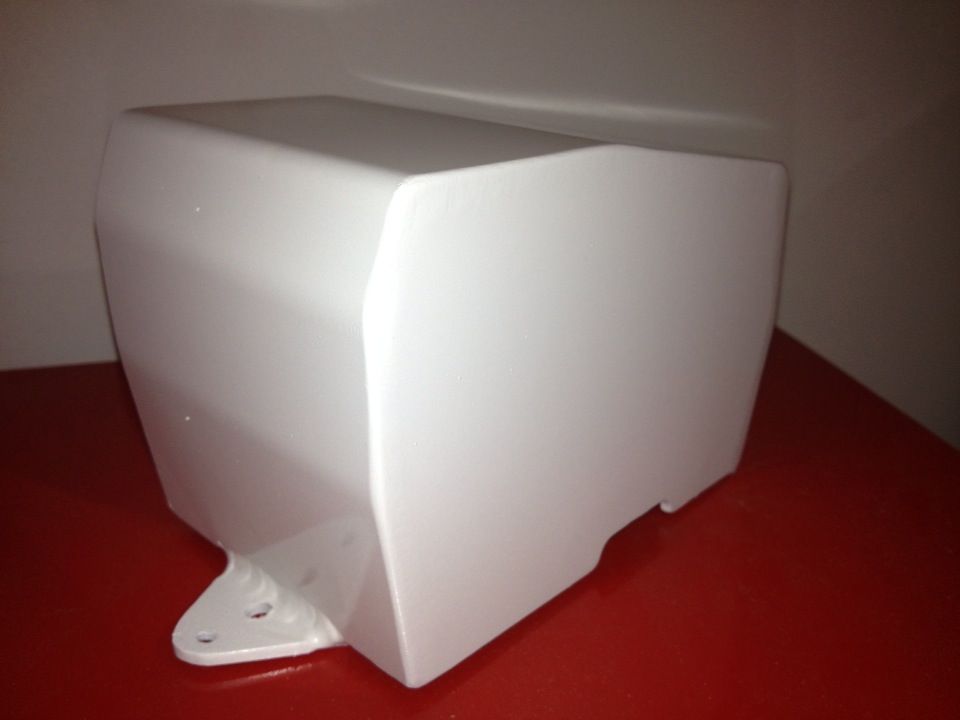
After the multiple coats of white paint were completed this is how it looked.
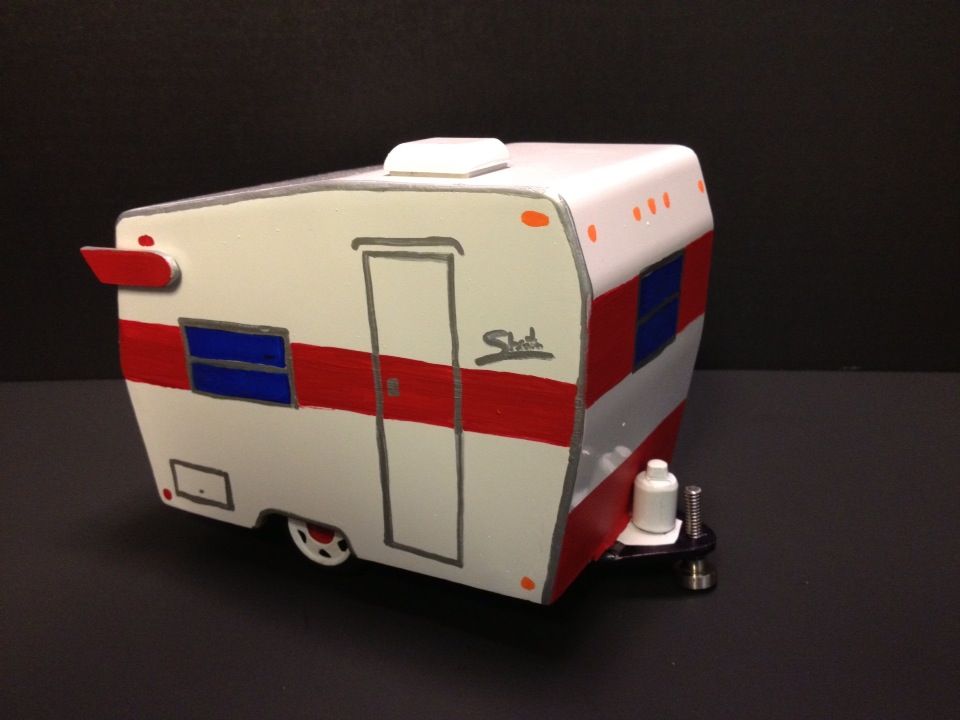
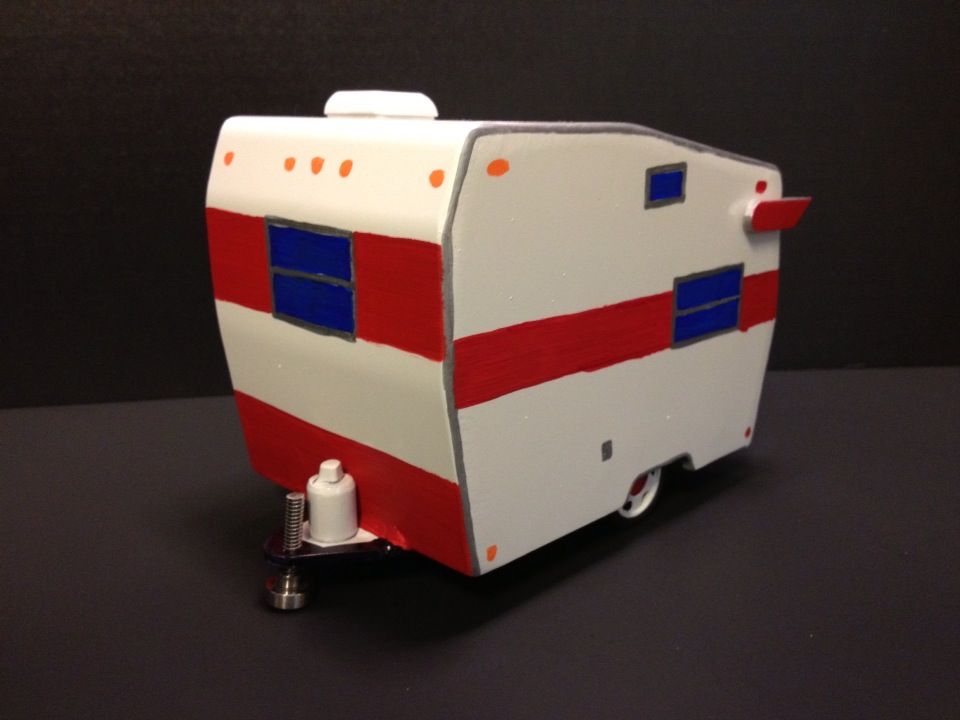
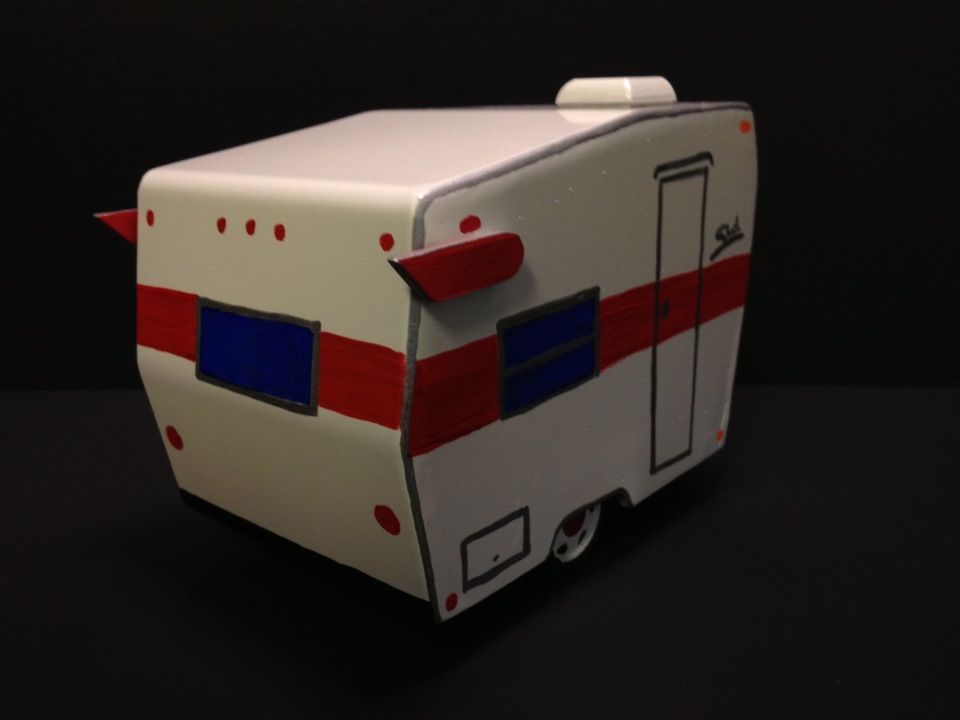
And finally i free handed the paint work and details (the only part i was not 100% satisfied with but I did the best i could)
The wings and vent are attached with 2-sided 3M tape. The LP tank is screwed on from below the hitch. The hitch jack itself works so you can raise and lower the front of the camper. Its just a simple screw jack deal.
This was originally going to be an anniversary gift for my wife but I came up with said idea only 2 weeks ahead of that date. SO.... it became a Christmas gift. Sure was hard to keep a secret but i needed more time to complete it. Had to fit it in where i could at work and then the time spent on it at home had to be done when she was working evenings (which is rare).
Took photos along the way of how I made it, if your interested in reading that scroll through the photos. If you just want to see the final project just skip to the bottom.
The process.
I work at a place that makes aluminum/steel products. Having been taught how to run the machines makes it easier to sneak some personal items through. This guy was made out of scrap metal, drop metal off of full sheets. I had used a side shot of our trailer to draw up all the main lines in CAD so I knew what sizes i was looking for. I found some .090 metal in the scrap bin and got to work.
Had to cut the blanks first, then using the press brake and a little guess work on the settings made the front/top/back piece. (its all one piece) I made the sides to fit the final product of the top. This was actually the 2nd top piece i had to make. Made a mistake on the first one. Had all my bends completed and went back to touch up the angle of one. Put the press on the wrong bend and suddenly my back wall was about 30 degrees to the roof.... sigh.... But the second came out better and it ended up being the final parts cut.
So this is the parts cut out and just placed together. Not welded yet. The white you see on the top/front is a PVC plastic sheet used to protect the metal in production. I just had not peeled it off yet.
Here are the little roof vent made out of a 1 x .25" stick of alum flat bar and the little LP tank made of 1/2 alum rod sitting on a hitch.
Of course i needed wings. Here those are with a quarter just for scale.
I went to Goodwill in the hunt for wheels for it. I was lucky and the first time i tried to find some i scored this little cheap RC car. The rear axle/wheels were the perfect size and width so .99 cents later i had my wheels.
Now the camper has been spot welded from the inside in prep for the TIG weld that would complete the welding process.
And here it is with the TIG welding done.
A shot of the underside showing the cross support for the axle mounts
And a shot with the wheels mounted for the first time.
Just checking to see how it sits
Filed off the weld by hand to create a smooth side/corner. Touched up the file work with the sanding disc on the dremel
Then roughed it all up for better paint adhesion
After the multiple coats of white paint were completed this is how it looked.
And finally i free handed the paint work and details (the only part i was not 100% satisfied with but I did the best i could)
The wings and vent are attached with 2-sided 3M tape. The LP tank is screwed on from below the hitch. The hitch jack itself works so you can raise and lower the front of the camper. Its just a simple screw jack deal.