|
|
Post by idqrocks on Feb 19, 2012 23:51:51 GMT -5
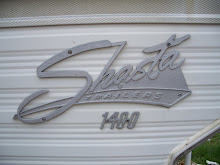
Hello!!!! We just bought a 1962 shasta airflyte! We are super excited, but also freaked out to the max.  I am sure i will keep returning for lotsa help as we go... Here is our new blog... paxtonshasta.blogspot.com/ |
|
|
|
Post by '59PinkDeluxe on Feb 20, 2012 0:16:16 GMT -5
Love it! Congratulations! I have a 1959 Deluxe that I've been restoring. She's gonna be a beauty and I too am sooo excited to get it done and start the adventures. Best of luck. A blog already. I'm impressed. I need to do that!
|
|
|
|
Post by hntnhrd on Feb 20, 2012 9:55:15 GMT -5
Looks to be in great shape to start with. Good luck and enjoy the project.
|
|
|
|
Post by schweetcruisers on Feb 20, 2012 21:07:57 GMT -5
That's cool, I wish mine had nice skin like yours. Pulling these apart is the hard part.
|
|
|
|
Post by sodashoponwheels on Feb 23, 2012 18:47:22 GMT -5
Congratulations! Looks like "Bob" is a charmer! Enjoy your restoration.
|
|
|
|
Post by idqrocks on Feb 23, 2012 23:59:29 GMT -5
We started tearing out all the guts and i have to say, i thought it was gonna be easy. Boy was i WRONG! Just when you think you got out all the screws, you find more, then it still wont budge because it was nailed in place from the outside.  I am finding tons of leaks too. Not just around the windows, but along the ceiling corners where it meets the roof. I am not sure how that happening? I am going to put an order into vintagetrailersupply.com soon. Pretty sure i will have to take out a second mortgage to pay for it! |
|
|
|
Post by '59PinkDeluxe on Feb 24, 2012 0:18:54 GMT -5
|
|
|
|
Post by idqrocks on Mar 9, 2012 10:56:44 GMT -5
Well, I went a little ape crazy on it. I was hoping to keep as much as I could from the interior and reinstall when I was done, but almost EVERYTHING was screwed in the from the outside which made getting things out in one piece nearly impossible.
1 hour with and hammer and crowbar, and I feel MUCH better!!!! ;D
But, it looks like I will be doing more work later
I will try and update my blog tonite.
|
|
|
|
Post by harrison429 on Mar 9, 2012 19:51:51 GMT -5
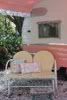
This is the first time I've seen your post and pix...great detail on the seats and construction. I hope you didn't throw away those potentially cootie infested cushions because they are salvagable!! That is, if you really want to salvage them. Before throwing them out wash them. How you say? Outside hose them down, add soap and start stomping on them to get the soap all the way through. Do this everywhere you can just avoid using a scrubber because it will 'pill' the fabric. I've done this successfully on other old cushions and I'd totally try that before throwing away something not only cool but costly to replace, especially done to the 'quality' it was done decades ago. If you try it let us know how it turns out. Good luck.
|
|
|
|
Post by idqrocks on May 3, 2012 22:58:27 GMT -5
Finally wrapping up all the exterior. I can't wait to get started on the inside!
What does everyone use for insulation? I was thinking about the silver foil bubble type.
Thanks!
|
|
boandsusan
2K Post Member
 Christmas parade 2012
Posts: 2,000
|
Post by boandsusan on May 3, 2012 23:51:41 GMT -5
We used 3/4 inch. Styrofoam from lowes. Real easy to cut and work with.
|
|
|
|
Post by harrison429 on May 4, 2012 2:46:22 GMT -5
We bought the bubble type and the styrofoam and quickly decided the stiff styrofoam was much easier to work with.
|
|
|
|
Post by idqrocks on May 4, 2012 8:31:48 GMT -5
Styrofoam it is! How do you keep it on place? Glue? Tape? Or cut it tight enough keep itself in place?
One other question...
How do you fix all the leaks? You can check our blog for all the work we have done, but I am still getting a few leaks around Windows and stuff. Aaaaarg! It's driving me nutzo!
|
|
boandsusan
2K Post Member
Christmas parade 2012
Posts: 2,000
|
Post by boandsusan on May 4, 2012 11:28:24 GMT -5
idqrocks, I`ve sent you a pm.
|
|
|
|
Post by idqrocks on May 4, 2012 14:46:52 GMT -5
Thanks!
|
|
vikx
3K Post Member
Posts: 3,556
|
Post by vikx on May 5, 2012 0:31:06 GMT -5
Leaks: Most leaking is caused by failed putty under the edge trim. Pull the trim, clean, inspect the holes (sometimes gluing plugs is advised) and use new RV putty tape to re-install the trim. The screws MUST have a good grip to ooze the putty. Also, the edge trim should be seated to the body with a rubber hammer. Let the putty cure and then trim.
Check your roof metal for deterioration and pin holes. If that is the case, you will need new metal up there.
Insulation: I use both foam (cut to fit tightly) and bubble wrap. Love the wrap, hate the foam. All those little white beads sticking everywhere. Arggh!! The wrap is stapled to the studs and/or roof rafters.
|
|
cowcharge
1K Post Member
I suffer from Shastasomiasis.
Posts: 1,471
|
Post by cowcharge on May 8, 2012 15:36:22 GMT -5
I used tuff-r rigid foam insulation in mine, the one with the silver on both sides, 1 1/2" thick (it had the highest r-value and best mildew and water resistance too, IIRC). I just fit it tightly into place, but also used aluminum tape to cover the inside seams and wood frame to make a vapor barrier, since I live in the frosty North. Vikx is right, the little beads are a pain, but the shop vac eats 'em up good. If you can find a razor knife that's long enough to go all the way through the sheet, you won't get as many beads, but I didn't have one, so I would make the first cut with the knife, then use a hacksaw blade to cut the rest of the way through. And a few cans of expandy foam for filling around 110v outlets and the holes where propane lines and water drains pierced the hull, and around the 110v wiring in the walls where I couldn't fit sheets.
|
|
vikx
3K Post Member
Posts: 3,556
|
Post by vikx on May 9, 2012 0:27:01 GMT -5
I use a small jig saw on the foam... it is great but there's lots of beads...
|
|
cropper2
100 Post Member
 "Trixie"
Posts: 184
|
Post by cropper2 on May 12, 2012 5:20:24 GMT -5
Wow. She's a beauty! And you've made so much progress! You're an inspiration. I'm still in the shock and disbelief phase. |
|
|
|
Post by idqrocks on May 12, 2012 8:25:07 GMT -5
Ahhhh...I Remeber that phase well!
I am just glad to be working now on the inside. When you work on framing and exterior, it seems that nothing looks different. I would tell my family, "it looks the same....but I have done a TON of work!".
This afternoon I am going to start paneling. Anyone have pointers on how to do it?
My plan is to use small brads in my air nailers and then use some small screws with collars for extra holding power.
Keep in mind that I am going to have to use 1/4 in birch plywood since 1/8 isn't available.
|
|
vikx
3K Post Member
Posts: 3,556
|
Post by vikx on May 13, 2012 1:23:49 GMT -5
You might consider kerfing the back of the ply to facilitate the curving... or get it wet. 1/8 panels are usually available as "doorskins". Sometimes the kids behind the counter aren't sure what 1/8 means...
|
|