|
|
Post by universalexports on Mar 31, 2012 19:31:26 GMT -5
so I am replacing the wood frame under my front curb side window and most of it was rotted or gone, so how much bracing should be under the window, here is what I have, but I think it need one more piece either horizontal or vertical?? ideas? 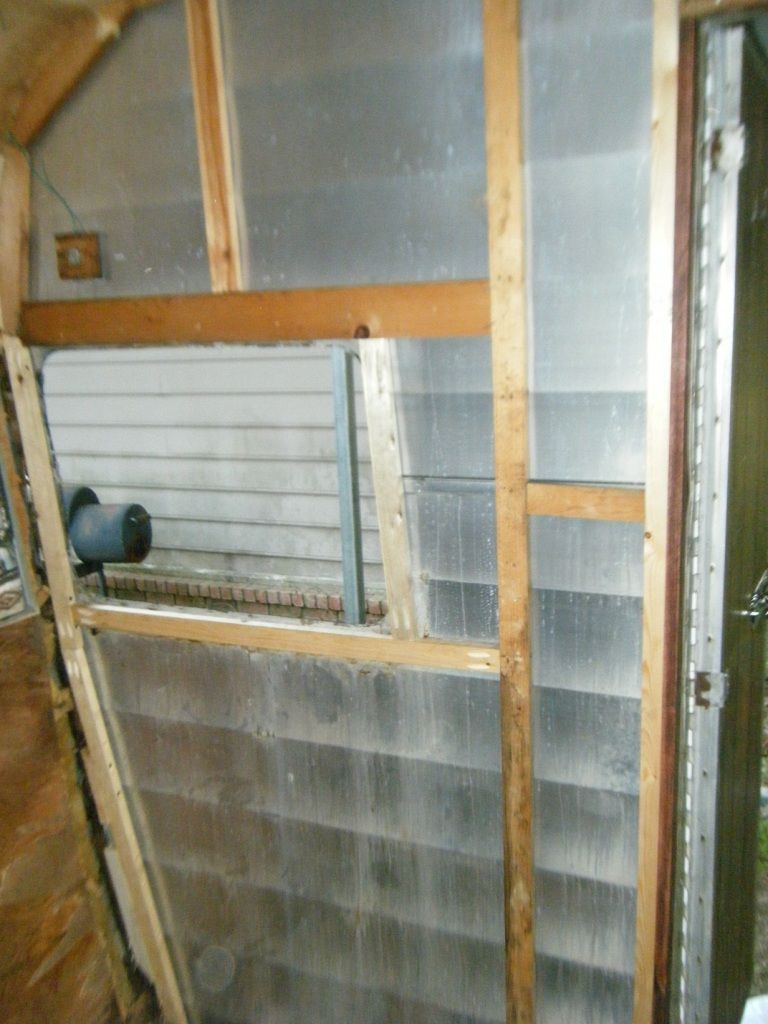 |
|
61 Shasta
100 Post Member
 Chuck's Waggin
Posts: 194
|
Post by 61 Shasta on Mar 31, 2012 20:34:10 GMT -5
You really need one horizontally between the bottom of the window and the floor. One would do it, 2 splitting the distance would be even better.
|
|
|
|
Post by schweetcruisers on Mar 31, 2012 20:53:30 GMT -5
If its like mine, your only missing one vertical running from the sill plate to the lower window frame, if you look you can see the discoloration on the skin where it goes, about center of the the window.
|
|
boandsusan
2K Post Member
 Christmas parade 2012
Posts: 2,000
|
Post by boandsusan on Mar 31, 2012 23:52:24 GMT -5
We don`t have the same model but we did have the same framing problem. We added one horizontal (about half way between the window and the floor). We then added 3 more vertically ( 1 below the new horizontal and 2 above). We thought that would support the window a bit better.
|
|
|
|
Post by dawgpound on Apr 1, 2012 7:03:07 GMT -5
Don't mean to change direction of the topic, but since I see a potential future problem, I will point it out.
Do you notice the water stains running down from the bottom of the window opening? This is a common and an easy fix. Put a small dot of clear sealant in each screw hole before the window frame with butyl tape applied is screwed back into place. Most forget about the dot of sealant in the screw holes. If you look at the old framing around the window openings, there will be black spots or small areas of rot. This is from water traveling into the wood via the screw threads. A dot of sealant will prevent this from happening.
The one area that most people forget to seal is the Pittsburgh Bend seams. Look at the middle of the window opening, between the window framing and the door framing and notice the water stains running down from the seam. This is a must for sealing. It can be and should be done from the outside.
Just my 2 cents.
|
|
|
|
Post by universalexports on Apr 1, 2012 8:23:57 GMT -5
Ross, good eye and thanks, I need any any advise I can get, I'm learning as I go. and I got a long way to go.
the good news is their is not a lot of silicone on the outside of my camper, the bad news is a lot of wood is rotted from water.
|
|
cropper2
100 Post Member
"Trixie"
Posts: 184
|
Post by cropper2 on May 18, 2012 7:20:25 GMT -5
Oh! I'm so glad that I read this one, as I'm about to start my repairs and have to remove two of the windows. So now I know to put the clear sealant in the screw holes.
But what is a Pittsburgh Bend seam?
|
|
|
|
Post by dawgpound on May 18, 2012 8:22:46 GMT -5
The Pittsburgh Bend or Fold is the folded aluminum at the bottom of each section of the siding. Then the top of the next piece of siding slides up into the the Pittsburgh Bend. At the factories, this joint was never sealed.
When you remove one of the windows or the door, you should be able to see what the Bend looks like.
I will try to take a picture of it today and post it this afternoon.
|
|
cowcharge
1K Post Member
I suffer from Shastasomiasis.
Posts: 1,471
|
Post by cowcharge on May 18, 2012 9:25:29 GMT -5
When I was working inside the camper during cold weather with lots of bare aluminum condensing the air and some rain/slush coming in through the rotted fridge vent, I noticed that water can travel a long way sideways in those seams, just like a gutter. Made it a good twelve feet away from the entry point in mine before it hit an obstruction and overflowed down the wall. That's one of the reasons it's so hard to trace leaks, and why I would never bother trying to reseal only one part of the roof line.
|
|
cropper2
100 Post Member
"Trixie"
Posts: 184
|
Post by cropper2 on May 18, 2012 21:00:52 GMT -5
Aha! Now I get it. Thanks!!
|
|