|
|
Post by jasonsei on May 28, 2013 14:36:14 GMT -5
I'll start posting here. I go to pick up my camper tonight. I'm not going to be doing a HUGE project with it.. like some of you professionals have done on this board! But I will post my stuff and REALLY hope I do a good job! Any input, suggestions, help, anything, will be greatly appreciated!!!! Here is a picture of what I am picking up   |
|
|
|
Post by jasonsei on May 28, 2013 15:15:42 GMT -5
One question, if anyone knows.... From what I can tell, a 'bunk' used to exist in this camper.. but I can't seem to see 'where'. any ideas? The brochure I saw posted 'looks' like it may be in the back, over the rear window. Would love to see if anyone else has it or knows?
|
|
|
|
Post by jasonsei on May 29, 2013 8:01:17 GMT -5
So I got the trailer home last night... the ride was great actually! But it was during the worst wind/thunderstorm we have had in a LONG time.. wow, what an adventure! I got it to the top of my very steep drive and realized I couldn't see 5 feet out my windows to back this thing up next to my garage. My father was with me, poor guy.. so he volunteered to get out and help me guide it into one of my parking spots at least. I swear, the moment he stepped out of the truck it began to ran 100x harder... seriously. I felt really bad. Here is a picture of us gassing up after picking it up. More pics to follow, hopefully this week. I don't have a 'ton' of structure work to do, but I think I'm going to have to replace a few pieces on the roof and in the floor. Everything else is going to be cosmetic, I hope! 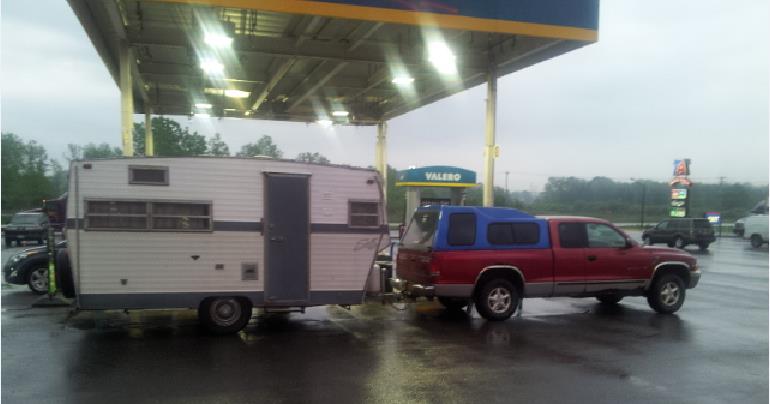 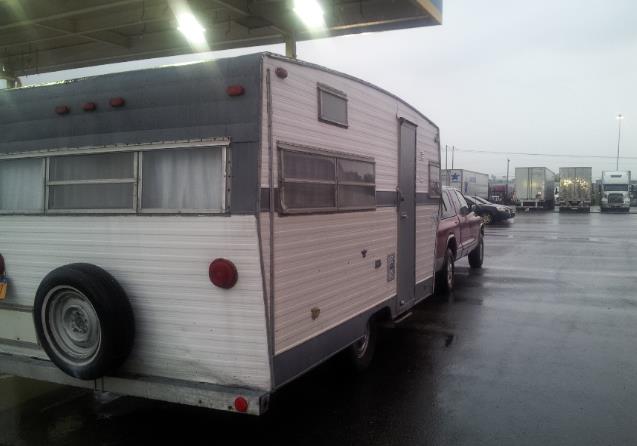 http:// |
|
machinelf
New Member
1971 1400 named Harriet
Posts: 9
|
Post by machinelf on May 29, 2013 15:27:34 GMT -5
Congrats on the acquisition! Looking forward to seeing how it goes.
|
|
|
|
Post by jasonsei on May 29, 2013 15:34:45 GMT -5
Did some cleaning in the trailer on my lunch hour...
I have to take off the ceiling panels and replace some wood and reseat/redo both vents.. one in the main room and one in the bathroom.
I noticed that some 'red' was showing through the outside stripes. Seems that someone painted grey over it. I prefer the red, as does my wife.
When digging through the cupboards I found a TON of original maintenance papers and instructions from Shasta that have been in there since it was bought.. very cool!
First on the list is some new sealant for the roof and replacing/fixing the vents. Pictures at the end of this week I hope!
Ah, and I think we are coming up with a name for her too... we are thinking Molly.
|
|
Deleted
Deleted Member
Posts: 0
|
Post by Deleted on May 29, 2013 22:06:39 GMT -5
Oh please oh please Oh PULLL--EEase share the paperwork with us! Originals are very tough to find and most of what is available has been brochures and layout sheets. I would love to see what was packaged originally with this model especially.
|
|
|
|
Post by jasonsei on May 29, 2013 22:19:59 GMT -5
Oh please oh please Oh PULLL--EEase share the paperwork with us! Originals are very tough to find and most of what is available has been brochures and layout sheets. I would love to see what was packaged originally with this model especially. Not a problem! Ill scan them all and post them tomorrow |
|
|
|
Post by jasonsei on May 30, 2013 14:57:39 GMT -5
|
|
|
|
Post by jasonsei on Jun 4, 2013 13:49:24 GMT -5
I'll be posting pictures later this week!
I got the ceiling tore off, the cupboards removed, the back top part of the wall off, and purchased the new wood and paneling. whohoo! Oh, and I sealed the roof!
I found a lot less rot than what I thought after pulling stuff down.
pics coming!
|
|
|
|
Post by jasonsei on Jun 6, 2013 8:22:58 GMT -5
Last night I was able to finish putting up the back wall. It was interesting since I had to do it at 10:30 at night... tired....cold, and wishing I was in bed. :-) Anyhow.. It went well. Replaced the wood behind the top of the back wall and put up paneling and new window framing. PO had replaced the back wall but had just put it up over rotten wood from a previous leak. Seems that was done a lot with this trailer. The paneling I pulled down from the ceiling was just tacked up over the original rotten paneling. But what I did find, was that the roofing frame had been replaced recently... odd. The frame was newer, the paneling was rotten.. and then new paneling was tacked over it. *shrugs* ok... So now that I got the new ceiling on and the back wall frame/wood replaced, I started getting worried about the roof leaking. I have resealed it, but the first rain was in the forecast for that night and I had just put the new ceiling up. I got up this morning and went straight outside to check for leaks..... none yet!! whohoo!! It's supposed to rain for the next 4 days... that's a test at least. Here are some pics. www.flickr.com/photos/49496450@N05/sets/72157633929734891/ |
|
Deleted
Deleted Member
Posts: 0
|
Post by Deleted on Jun 6, 2013 9:17:15 GMT -5
Anyhow.. It went well. Replaced the wood behind the top of the back wall and put up paneling and new window framing. PO had replaced the back wall but had just put it up over rotten wood from a previous leak. Seems that was done a lot with this trailer. The paneling I pulled down from the ceiling was just tacked up over the original rotten paneling. But what I did find, was that the roofing frame had been replaced recently... odd. The frame was newer, the paneling was rotten.. and then new paneling was tacked over it. *shrugs* ok... This is just another perfect example of how confusing it can be trying to make repairs on these old trailers. To most people it is a matter of patching and covering. If you have not ever seen the inside workings of the framing, and understand the order they were built, there are not many options aside from covering up. |
|
|
|
Post by jasonsei on Jun 7, 2013 8:27:28 GMT -5
This is just another perfect example of how confusing it can be trying to make repairs on these old trailers. To most people it is a matter of patching and covering. If you have not ever seen the inside workings of the framing, and understand the order they were built, there are not many options aside from covering up. It is pretty confusing heh. Worse, because I have 'never' done anything like this.. not even home repairs. So I'm completely new to it. But this forum has been a life saver. So many helpful people, great posts, pictures, instructions. I felt like I knew what I was doing before I even saw what was under my trailer! I originally had a goal of Labor Day for my first voyage... My wife has moved that goal to July 4th... ha ha. I think Pinterest has ruined her sense of reasonable time tables hahaha I'm doing some wood putty repair tonight and hopefully getting everything ready for a nice coat of primer this Saturday. |
|
|
|
Post by jasonsei on Jun 7, 2013 8:28:19 GMT -5
Well....
My roof did NOT hold up to the rain.. great...
I have a tarp over it now. Started leaking around the vent. Glad I didn't paint yet. Hopefully it will clear up tomorrow and I can check it out. I probably didn't seal something right.
|
|
|
|
Post by jasonsei on Jun 7, 2013 8:30:22 GMT -5
My back wall repair.  new ceiling 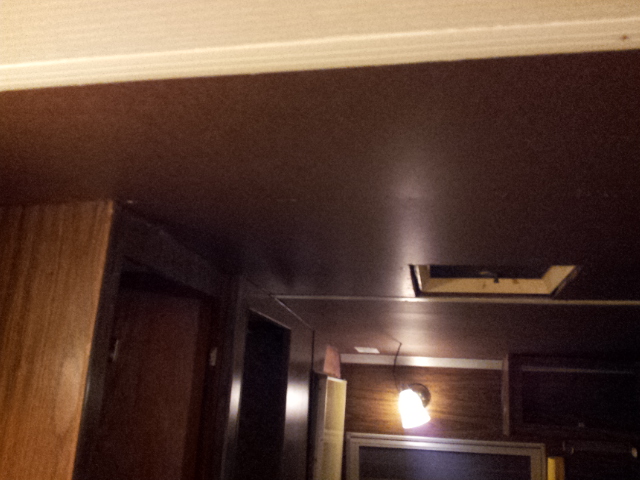 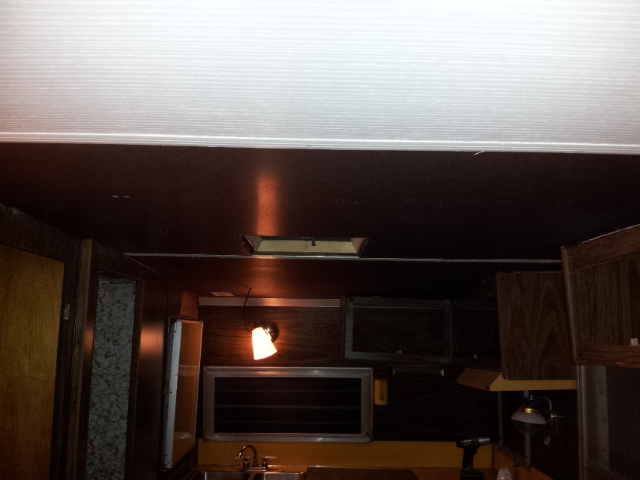 |
|
Hamlet
2K Post Member
 
Posts: 2,241 
|
Post by Hamlet on Jun 7, 2013 8:45:39 GMT -5
You're doing great on the camper. You mentioned that you needed to "reseal" the roof. The sound you heard wasn't the thunder and rain, it was a collective "GULP" from a bunch of us.,,
You didn't say what you meant by "reseal," but the way to stop leaking is to re-do the putty on all the joints and around the windows. SOmeone did a post on this not too long ago. You'll needsomewhere around 10-12 rolls of butyl (or putty) tape. The prep work is by far the most labor intensive, boring, icky, etc. You'll need to pull the trim, pieces, clean the old, dried putty out, then lay the new tape, screw down the pieces and clean up the edges. This will keep you leak free for years. Someone said it took a couple weekends. We did a frame-up on Hamlet, so we don't really know how long it would have taken, Good luck!
|
|
|
|
Post by jasonsei on Jun 7, 2013 9:38:39 GMT -5
You're doing great on the camper. You mentioned that you needed to "reseal" the roof. The sound you heard wasn't the thunder and rain, it was a collective "GULP" from a bunch of us.,, You didn't say what you meant by "reseal," but the way to stop leaking is to re-do the putty on all the joints and around the windows. SOmeone did a post on this not too long ago. You'll needsomewhere around 10-12 rolls of butyl (or putty) tape. The prep work is by far the most labor intensive, boring, icky, etc. You'll need to pull the trim, pieces, clean the old, dried putty out, then lay the new tape, screw down the pieces and clean up the edges. This will keep you leak free for years. Someone said it took a couple weekends. We did a frame-up on Hamlet, so we don't really know how long it would have taken, Good luck! Yeah, sorry about that. I 'did' read the post you are referring too. I did do the putty work on the seals and the windows.. what I think I did is NOT do a good job around the sky light/vent. I need to redo that. Sorry for the confusion : -) The PO had just slapped a ton of layers of black tar on the top. Black tar of all things! You can see it dripping down in the firs pictures I posted *rolls eyes* |
|
|
|
Post by jasonsei on Jun 7, 2013 9:54:46 GMT -5
BTW
I don't have the time or the funding to 'entirely' remove the PO's black tar from the roof. I scraped as much as I could and will have to deal with what I can.
|
|
Deleted
Deleted Member
Posts: 0
|
Post by Deleted on Jun 7, 2013 10:51:41 GMT -5
My condolences...that black goop is the bane of any of these old trailers. It tends to hold the moisture IN after it starts to seep, rather than keeping it OUT. It will after time pit the aluminum. I have never quite understood why anyone thinks that a solid sheet of aluminum would need to be goop-coated to make it waterproof....
I think the roof on the 16SC has a couple Pittsburgh seams in it. It also has 4 vents (2 vents with the "skylight", a vent over the refrigerator, and a plumbing vent). the absolute most that any sealer should be used may possibly be along the Pittsburgh seams. The vents are all sealed the same way, with putty tape and screwed down tightly to the framing around them. I would recommend taking some time and removing all you can of the tar from around the vents. Also, when you have them out, a small shim under the aluminum can help. There is usually enough slack to allow for a little bit of "wedge" between the skin of the roof and the framing, thus raising the area around the vent to cause water to run away from it.
|
|
Deleted
Deleted Member
Posts: 0
|
Post by Deleted on Jun 7, 2013 11:03:53 GMT -5
This was the "repair" job someone did on the center vent... 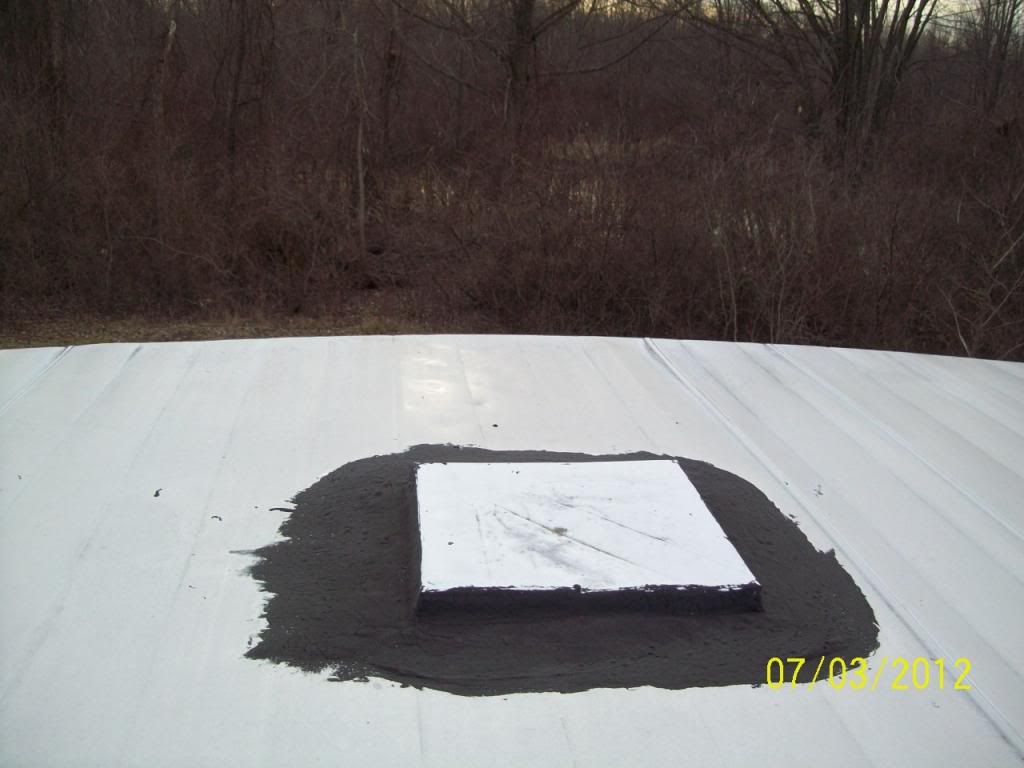 This is the vent, removed... 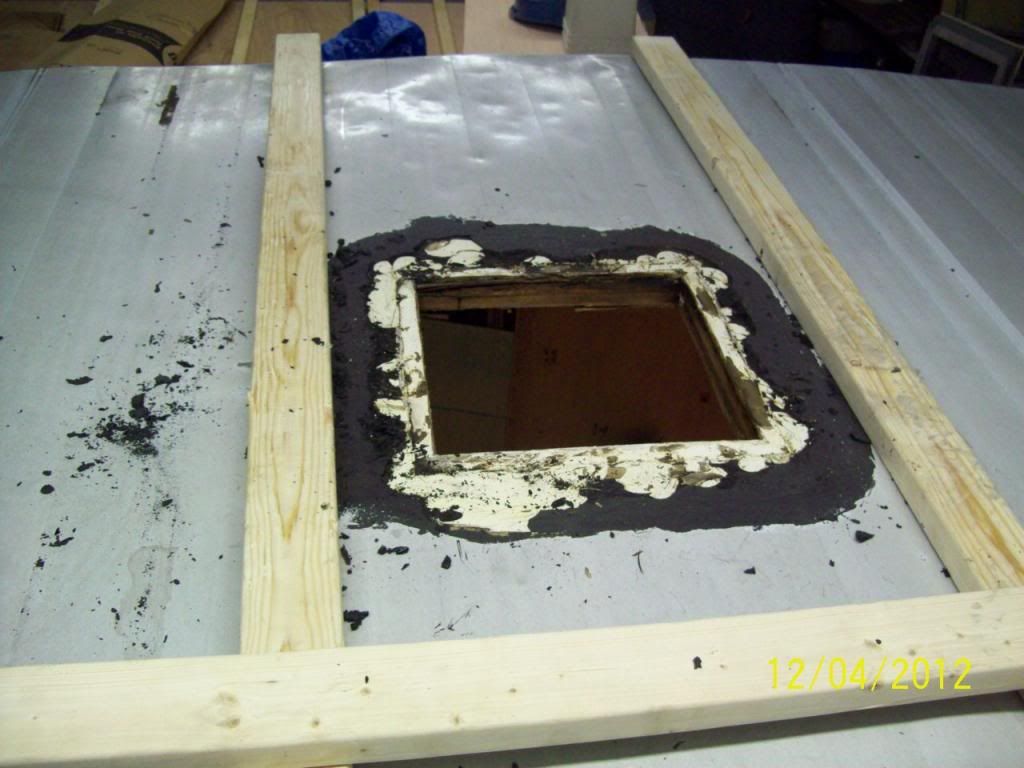 Uncoated roof: 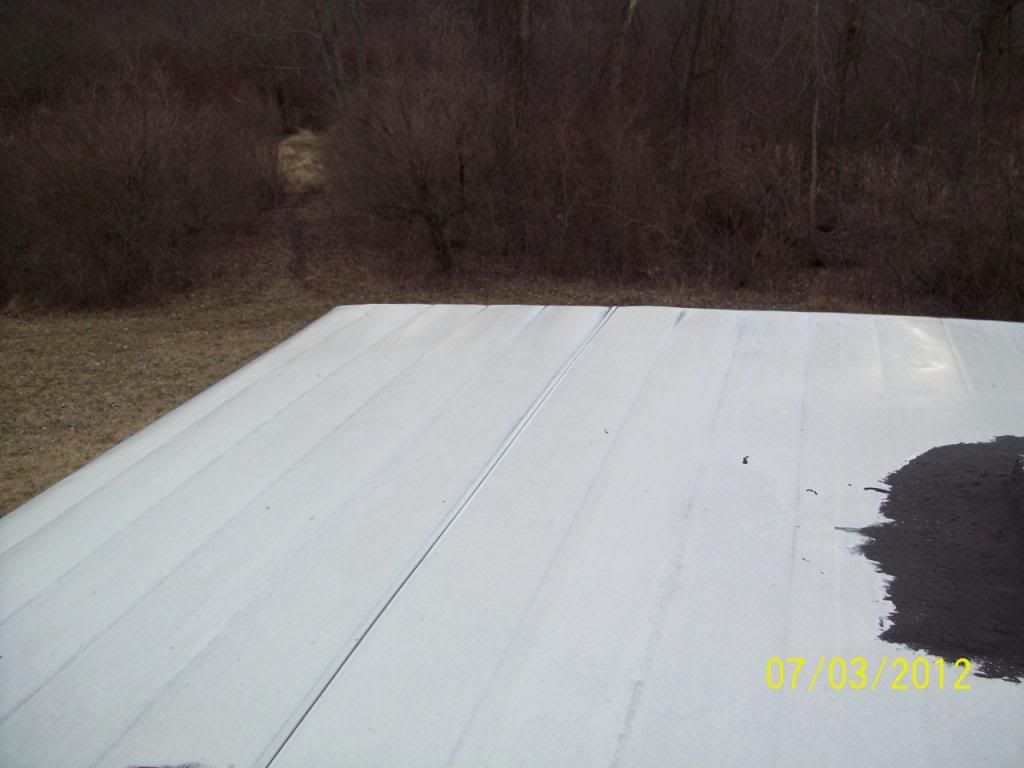 |
|
Deleted
Deleted Member
Posts: 0
|
Post by Deleted on Jun 7, 2013 11:09:33 GMT -5
Apologies to the owners...I don't know who to credit these photos to, but I have a couple in my collection of photos of the 16SC with their wings... 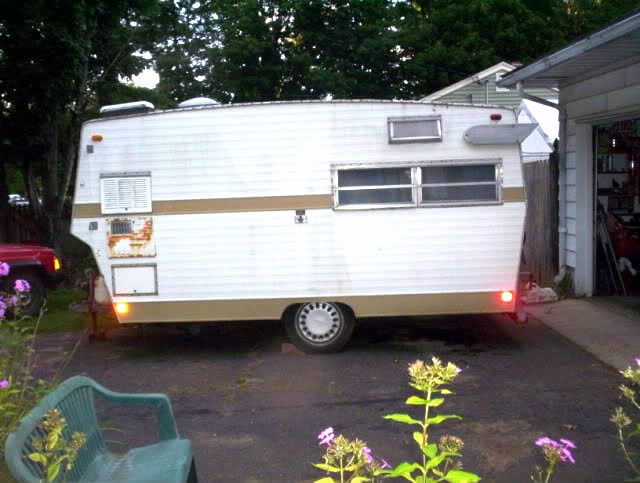 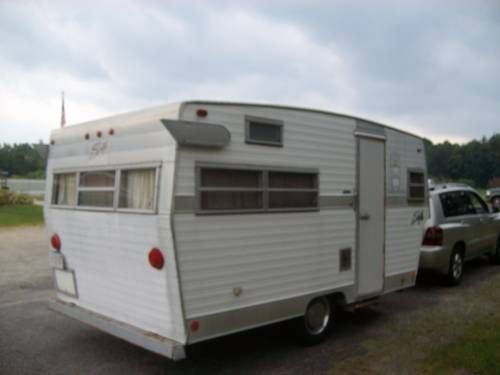 |
|
|
|
Post by jasonsei on Jun 7, 2013 14:11:41 GMT -5
Those are great photos, thank you!
Tomorrow the rain is supposed to let up. thank you all very much for the info on seams and vents. I'll be scraping and fixing tomorrow since we have a 2+ day sun streak coming lol.
P.S. about the wings. I'm still torn on what to do about those. I REALLY want to put wings back on this. With the awning that has an enclosed room, not a lot of wiggle room to do that.
I was thinking last night that maybe I can come up with some type of adapter/hook. Something that would allow me to attach and detach the wings when needed.. and kept the 'passenger' side wing up off of the side awning rail. Not sure if that would be purestenough though. I might get made fun of haha
|
|
Deleted
Deleted Member
Posts: 0
|
Post by Deleted on Jun 7, 2013 15:27:23 GMT -5
I would almost think a better option would be to cut out a section of the vertical rail, and snap the add-a-room over the wing. Here's why: These wings are a.) very sought after; b.) very expensive when you find them. You would be better served to design around them to anchor them securely, cutting the risk of accidental loss along the road or theft...
I don't remember if you mentioned where you are from. Your weather sounds like what ours has been...three days of rain and fog, work rained out, and clearing up tomorrow for a couple days.
Also meant to mention to you, that you should really consider pulling the windows out and re-sealing them also, as well as the J-channel rail along the edge seams. They are installed much the same way as the roof vent...putty tape and screwed firmly into the frames. The tape is as old as the stuff that is leaking in the roof after all...
|
|
|
|
Post by jasonsei on Jun 7, 2013 15:37:41 GMT -5
I would almost think a better option would be to cut out a section of the vertical rail, and snap the add-a-room over the wing. Here's why: These wings are a.) very sought after; b.) very expensive when you find them. You would be better served to design around them to anchor them securely, cutting the risk of accidental loss along the road or theft... I don't remember if you mentioned where you are from. Your weather sounds like what ours has been...three days of rain and fog, work rained out, and clearing up tomorrow for a couple days. Also meant to mention to you, that you should really consider pulling the windows out and re-sealing them also, as well as the J-channel rail along the edge seams. They are installed much the same way as the roof vent...putty tape and screwed firmly into the frames. The tape is as old as the stuff that is leaking in the roof after all... I'm from Western NY : - ) Good points about the wings. I was thinking of making my own.. but I guess that would still make them appealing for theft... I did re-seal the windows just like you mentioned, forgot pics of that. But I didn't think about J-Channel rails. The rails were all tarred over too, but they will be easier to take off and tape. I can scrape the tar off of those easier. I'll let you all know my progress. Again, thanks for the tips and the info! priceless! |
|
|
|
Post by jasonsei on Jun 7, 2013 15:40:29 GMT -5
Chris, I just looked at your profile and you are from WNY too? Sweet. I'm from the Springville, NY area.
|
|
Deleted
Deleted Member
Posts: 0
|
Post by Deleted on Jun 7, 2013 16:03:19 GMT -5
Lima, south of Rochester, here. No wonder the weather sounded familiar...!
Good to hear of the windows. The gutter channel is not all that difficult, but finding the screw heads in the tar might be a challenge. I saved all the channel from mine, if you were to need any...
|
|
|
|
Post by bigbill on Jun 7, 2013 19:05:54 GMT -5
Gee Chris You don't ever get any snow living around Rochester do you.  A friend of mine lived there for years, went to Florida one winter and the neighbor promised to rake his roof but the neighbor wound up in the hospital and the next thing they knew they got a call saying that their house roof had caved in. |
|
Deleted
Deleted Member
Posts: 0
|
Post by Deleted on Jun 7, 2013 20:00:57 GMT -5
Snow? What is that? A few good ones per winter, and once in a while a surprise in the springtime...other than that, it isn't snow...it's "lake effect". Some mornings there is more "lake effect" than others...  There is a lot more likely to fall closer to the lakes though, we are actually far enough away that it usually tapers off some. It gets scary at times though...I have a canvas "portable storage building" that my fuel and camper goodies stay in, and it sags on occasion. |
|
Deleted
Deleted Member
Posts: 0
|
Post by Deleted on Jun 8, 2013 5:50:04 GMT -5
@ Jason Similar-year trailer with the floral-print finish I was asking you about... If your ceiling was this type originally, you know now why it was changed out... 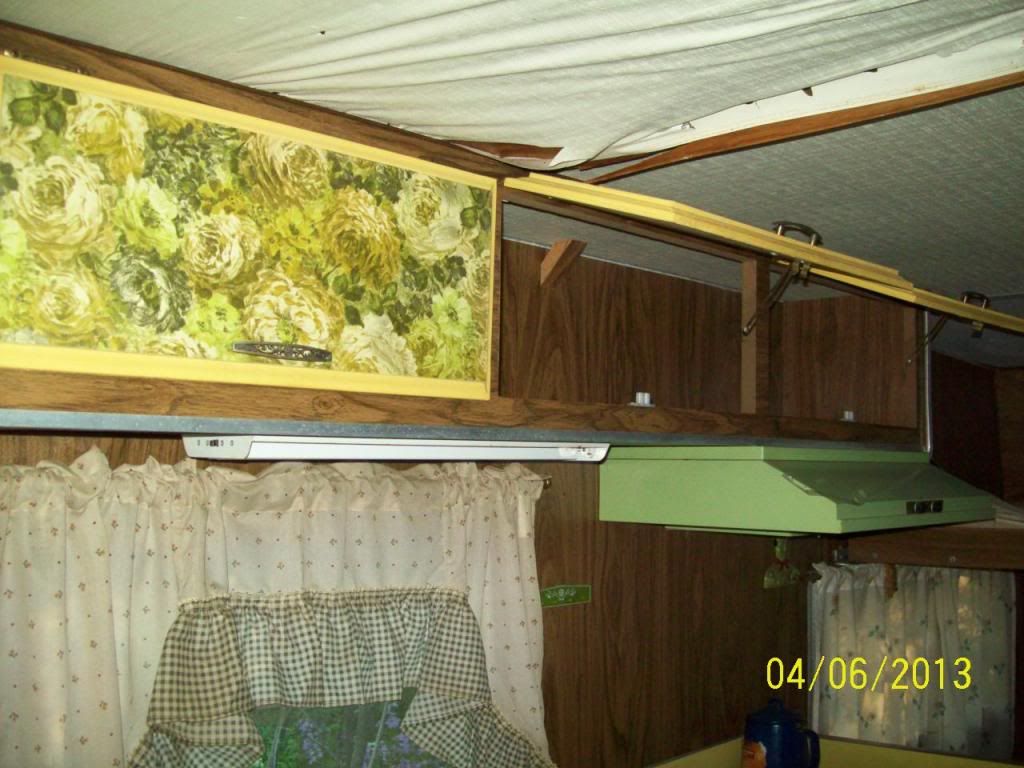 |
|
|
|
Post by jasonsei on Jun 13, 2013 9:27:58 GMT -5
Wow, that's some pretty epic floral print there... hahaha I finally got my leak on the roof to stop. All this rain, dry as a bone. Then of course, I noticed a small water spot near the rear window...all around the new framing I just put it on the inside. I have already replaced the seal on that outside window. I got the putty tape and redid the whole thing. The wet spot is on the top center of the inside window. Argh! So now I have to check and see what I screwed up. I hate being a newbie at doing this kind of stuff. On the other hand, last night I started priming all the walls and cupboards. Worked until about 10:30. Priming again tonight. Should be able to get it all done and I can start painting next week. @ Jason Similar-year trailer with the floral-print finish I was asking you about... If your ceiling was this type originally, you know now why it was changed out...  |
|
|
|
Post by jasonsei on Jun 13, 2013 9:29:10 GMT -5
Lima, south of Rochester, here. No wonder the weather sounded familiar...! Good to hear of the windows. The gutter channel is not all that difficult, but finding the screw heads in the tar might be a challenge. I saved all the channel from mine, if you were to need any... Yeah, you aren't that far at all. Cool. I found the screw heads, not that much digging actually. So far so good with that. As I mentioned in my last post, I have to recheck everything I did though because of that window leak. Argh!!!! |
|